User Provisioning with Entra-ID via SCIM
Creating a SCIM Provisioning application in Microsoft Entra-ID is a straightforward process that significantly enhances the management of user identities in cloud-based applications. In this article, we'll guide you through the steps to set up a SCIM Provisioning application for Spreadly.
Step 1: Create an Enterprise Application
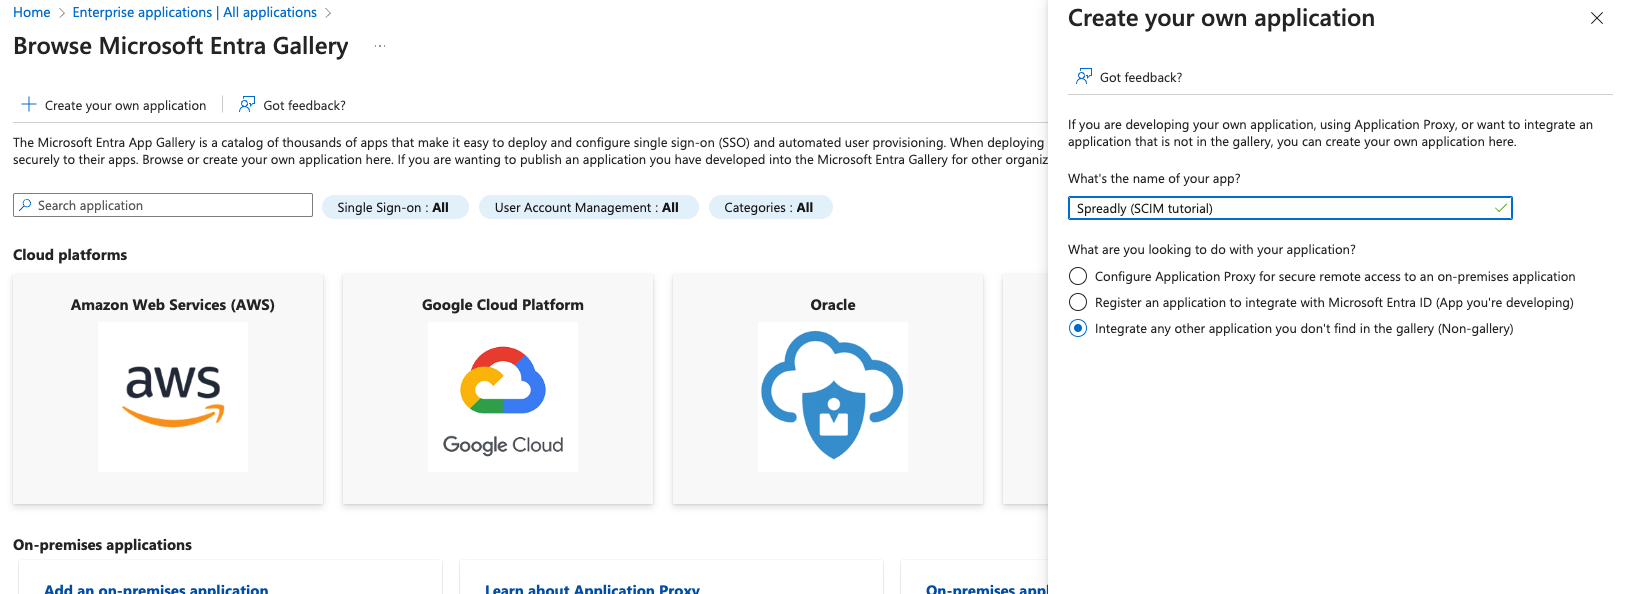
First, navigate to the Applications section in Entra-ID, and select Enterprise applications. Here, click on + New application and then choose + Create your own application. Name your application "Spreadly" and select the "Non-gallery" option. This step initiates the process of integrating your custom application with Microsoft's identity management solution.
Step 2: Obtain SCIM Secret Token from Spreadly
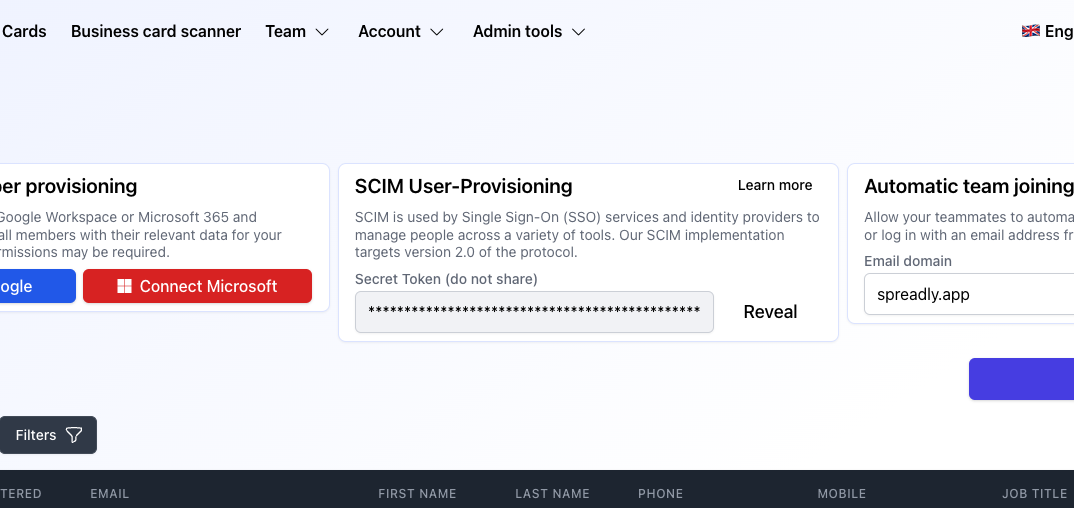
Access the "Team > Members > HR Integrations > SCIM synchronization" section in Spreadly to find your SCIM Secret Token. This token is essential for secure communication between Spreadly and Microsoft Entra-ID. Copy this token as you'll need it in the next steps.
Step 3: Set Up Provisioning
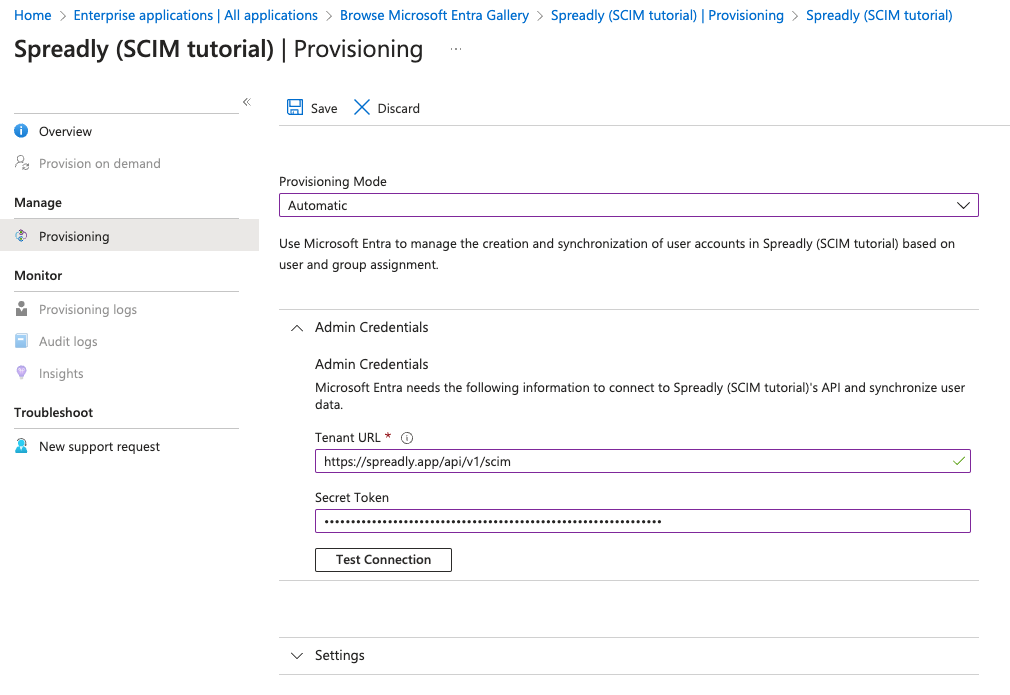
Now, open the newly created enterprise application in Entra-ID and go to Provisioning > Manage: Provisioning. Set the Provision Mode to "Automatic". Input the Tenant URL as https://spreadly.app/api/v1/scim and enter the Secret Token you previously copied from Spreadly. To ensure the setup is correct, click on "Test connection", then save your settings.
Step 4: Edit Mappings
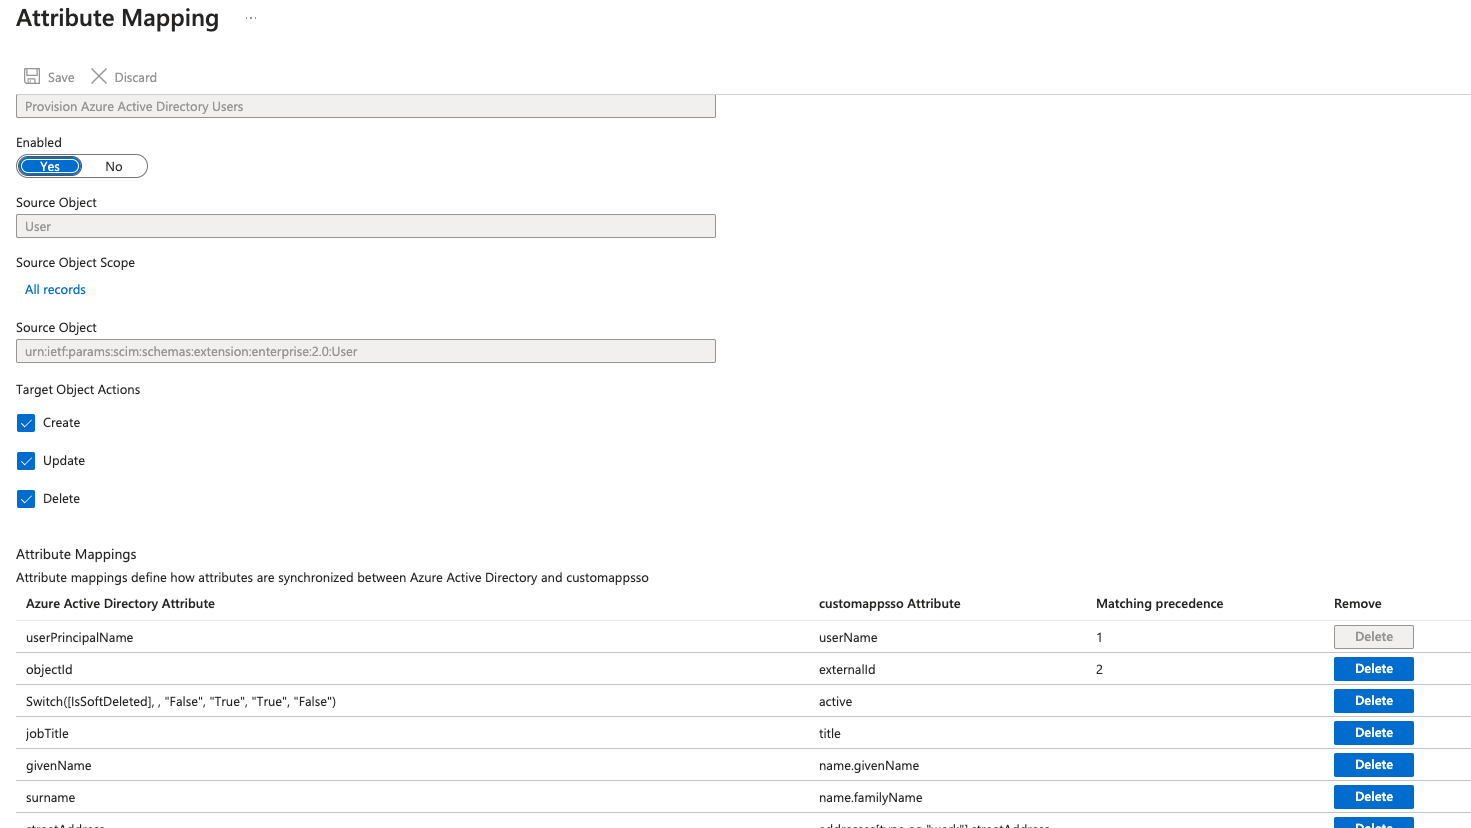
In this step, you'll configure how attributes of Users and Groups in Microsoft Entra-ID correspond to those in Spreadly.
User Mappings
objectId and userPrincipalName must be set up with the correct matching precedence.Azure Active Directory Attribute | customappsso Attribute | Matching precedence |
|---|---|---|
objectId | externalId | 1 |
userPrincipalName | userName | 2 |
givenName | name.givenName | |
surname | name.familyName | |
telephoneNumber | phoneNumbers[type eq "work"].value | |
mobile | phoneNumbers[type eq "mobile"].value | |
jobTitle | title | |
department | urn:ietf:params:scim:schemas:extension:enterprise:2.0:User:department | |
employeeOrgData.division | urn:ietf:params:scim:schemas:extension:enterprise:2.0:User:division | |
companyName | urn:ietf:params:scim:schemas:extension:enterprise:2.0:User:organization | |
streetAddress | addresses[type eq "work"][streetAddress] | |
city | addresses[type eq "work"][city] | |
postalCode | addresses[type eq "work"][postalCode] | |
state | addresses[type eq "work"][region] | |
country | addresses[type eq "work"][country] | |
See https://help.spreadly.app/en/article/user-provisioning-with-scim-20-10h4w3d/#2-user-attributes for the full list of supported SCIM attributes for users. |
Group Mappings
Azure Active Directory Attribute | customappsso Attribute | Matching precedence |
|---|---|---|
objectId | externalId | 1 |
displayName | displayName | |
description | spreadly:scim:Group:description | |
members | members | |
See https://help.spreadly.app/en/article/user-provisioning-with-scim-20-10h4w3d/#2-group-attributes for the full list of supported SCIM attributes for groups. |
Step 5: Test the Mapping
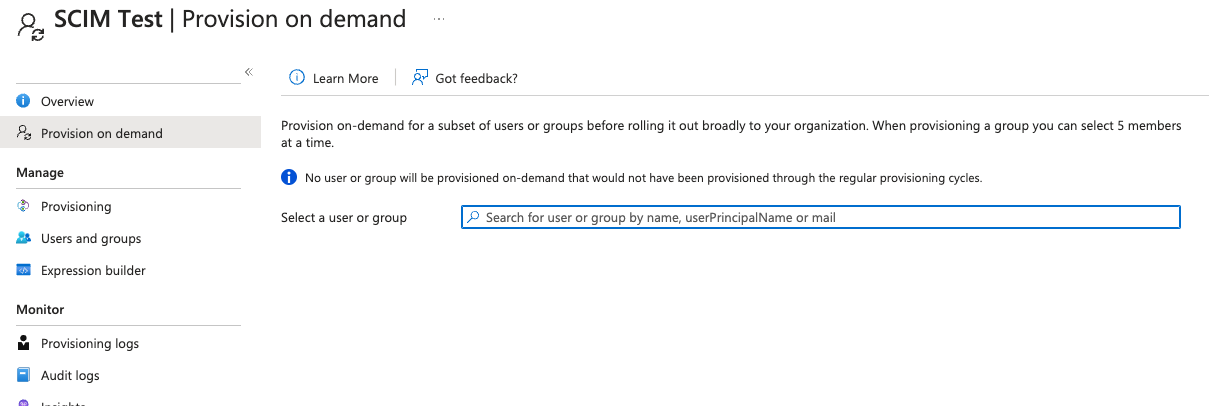
To verify that your mappings are correct, use the "Provision on demand" feature. Select a user or group to test the mapping. This step is crucial to ensure that the data flows correctly between Microsoft Entra-ID and Spreadly.
Step 6: Select Users/Groups for Provisioning
Finally, manage who will be provisioned by visiting "Manage: Users and groups" in your enterprise application. Here, select the users and groups you expect to be provisioned. This step determines which identities from Microsoft Entra-ID will be managed in Spreadly.
Step 7: Configure Single Sign-On (optional)
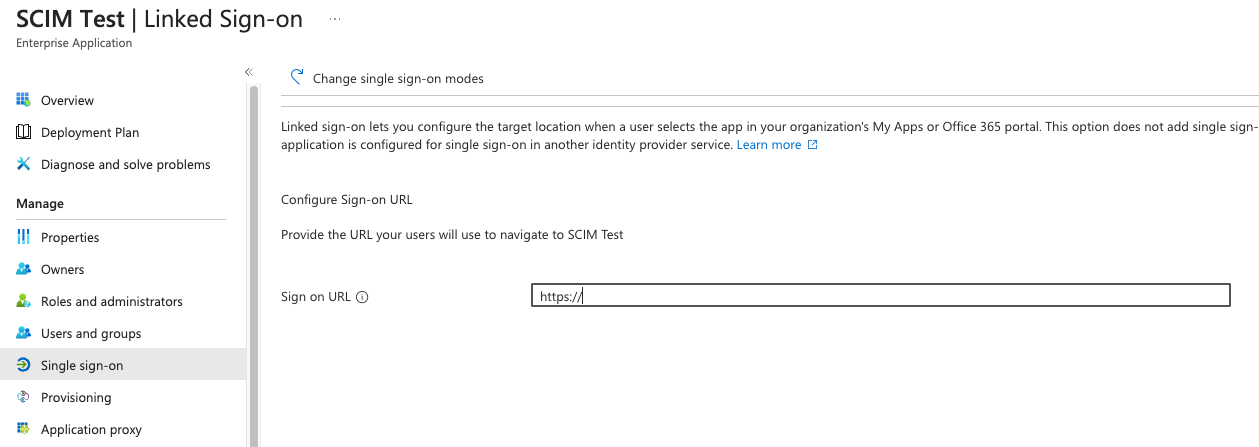
Finally, set up the Single Sign-On (SSO) feature for a seamless user experience. Under "Manage: Single sign-on," copy the Sign on URL from Spreadly's "Team > Settings." Additionally, upload the Spreadly application logo ( download here). For a cleaner user interface, make the default Spreadly App (Application ID: f6f257df-7ac4-4e92-886c-4768649ca097) invisible to users.
FAQs
I deleted a user in Entra, but they’re still shown in Spreadly.
For SCIM connections, Microsoft disables users first and deletes them after a 30-day grace period. After removing a user from the directory or sync scope, check Spreadly after 24 hours to see whether the user is marked as disabled. After 30 days, Microsoft will notify Spreadly through the SCIM connection to permanently delete the user. Deleting a user as soon as Microsoft disables them wouldn’t work because users may also be disabled temporarily for security reasons, using the same process.
Disabled users aren’t billed, and their access and cards are also disabled. They’re treated as deleted, but remain visible to you.Updated on: 04/10/2026
Thank you!